Build worker improvements
Posted on March 31, 2014
When deploying web application to different environments you don’t want to re-build application package every time with different configurations, but you want to deploy the same package (artifact) with some environment-specific settings configured during deployment. When using Web Deploy the problem can be easily solved by Web Deploy parametrization.
Usage scenarios
Most common use cases for Web Deploy parametrization is updating node/attribute value in XML files or replacing a token in text files, for example:
- appSettings in
web.config - connection strings in
web.config - WCF endpoints
- Paths to log files
- Database name in SQL install script
Parameters.xml
To enable Web Deploy parametrization add parameters.xml file in the root of your web application.
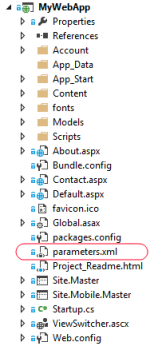
Parameters.xml contains the list of parameters required (or supported) by your Web Deploy package. In the example below we introduce two parameters - one to update path to log file in appSettings section of web.config and another one to set database name in SQL script.
Parameter element describes the name, default value and the places where and how this parameter must be applied.
Parameters.xml for our example:
<?xml version="1.0" encoding="utf-8" ?>
<parameters>
  <parameter name="LogsPath" defaultValue="logs">
    <parameterEntry kind="XmlFile" scope="\\web.config$" match="/configuration/appSettings/add[@key='LogsPath']/@value" />
  </parameter>
  <parameter name="DatabaseName">
    <parameterEntry kind="TextFile" scope="\\Database\\install_db.sql$" match="@@database_name@@" />
  </parameter>
When Web Deploy package is built you can open it in the explorer and see parameters.xml in the root:
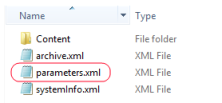
Resulting parameters.xml combines your custom parameters and system ones such as IIS Web Application Name. You don’t have to set IIS Web Application Name parameter explicitly - AppVeyor does that for you.
Read more about defining parameters: https://technet.microsoft.com/en-us/library/dd569084(v=ws.10).aspx
Setting parameters during deployment
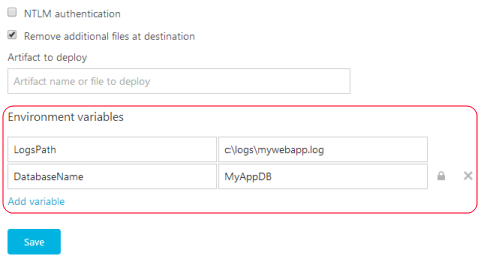
Web Deploy provider in AppVeyor analyzes Web Deploy package and looks into environment variables to set parameter values with matching names.
When promoting specific build from Environment page you set variables on environment settings page:
When deploying during the build session environment variables are used instead. You can set build environment variables on Environment tab of project settings, appveyor.yml or programmatically during the build.
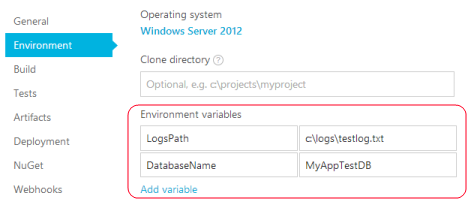
Variables defined during the build override those ones defined on Environment level.
Web Deploy parametrization is supported by Deployment Agent too when deploying from Web Deploy package.
Related articles:
AppVeyor 2.0 goes Live with the new pricing
Posted on March 26, 2014
I’m thrilled to announce that AppVeyor 2.0 officially goes Live and with the new aggressive pricing!
The New AppVeyor
After being almost two months in private and then public beta we finally upgraded production environment to AppVeyor 2.0 and developers truly love it!
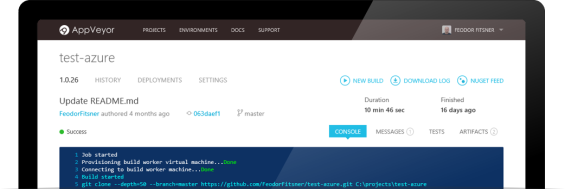
Let me quickly recap what new features AppVeyor 2.0 brings to you:
- Builds run on dedicated virtual machines
- Project configuration in YAML (aka
appveyor.yml) - Fine-grained control over build process
- NuGet feeds hosting
- Build matrix and parallel testing
- Built-in deployment to multiple environments
- Responsive, real-time UI
- A lot of other improvements and fixes
The New Pricing
AppVeyor 2.0 moved from shared build farm to dedicated build machines. With that change it was obvious the current pricing scheme must be adjusted to justify new architecture. We received a signal from our customers that new plans felt pricey and not affordable for individual developers and small teams. This was not exactly our intention. We don’t want you to go through nightmare of installing TeamCity or Jenkins on Azure VM! :)
We want AppVeyor to be a great tool in the hands of every Windows developer! We listened to you and we revisited our plans before going Live to make sure AppVeyor pricing works for everyone.
New plans:
| Open source | Professional | Premium | Enterprise | |||
|---|---|---|---|---|---|---|
| FREE | $39/month | $79/month | from $319/month | |||
| Unlimited public repositories | 10 private repositories | Unlimited private repositories | Unlimited private repositories | |||
| 1 concurrent job | 1 concurrent job | 2 concurrent jobs | 4+ concurrent jobs | |||
| Forums support | Email support | Email support | Priority technical support | |||
| - | - | - | Phone/Skype support |
Sign in to your existing account and start using AppVeyor for your next project!
Continuous Delivery of Windows Azure Cloud Services with AppVeyor CI
Posted on March 25, 2014
Introduction
AppVeyor is Continuous Integration service for Windows developers to securely build and test code in parallel and deploy successful bits to on-premise or cloud environments.
In this tutorial we’ll guide you through the process of setting up a continuous delivery process for sample Azure Cloud Service (Azure CS) application starting from a code push to a repository and finishing with deployment of successful build to Azure.
Note to Global Windows Azure Bootcamp attendees
On Saturday, March 29, 2014 Global Windows Azure Bootcamp (GWAB) will take place in 141 locations across the globe. If you are not registered yet go find a location near you and do that. AppVeyor CI is one of the sponsors of this event and during that time we will be giving 2 free months with the purchase of any AppVeyor plan to all GWAB attendees.
AppVeyor CI has tight relationship with Windows Azure platform. First of all, AppVeyor is built for Azure and it uses Azure IaaS to run your builds on dedicated virtual machines. Second, AppVeyor provides complete Continuous Delivery cycle for Azure projects, i.e. building, testing, packaging and deploying your web applications and Azure Cloud Services. GWAB training classes is a wonderful place to try AppVeyor and setup super-simple continuous integration for your lab project.
Sample project on GitHub
We’ve created a simple Azure Cloud Service solution created in Visual Studio 2013 and consisting of a WebRole and xUnit test projects. You can find sample project repository on GitHub.
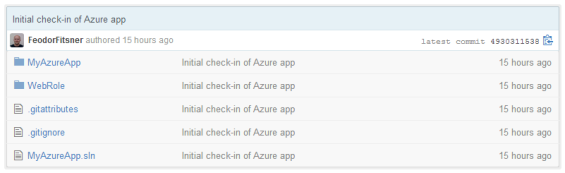
Note, that we don’t have “NuGet Package Restore” enabled for VS solution (no .nuget folder in repository). This is not necessary in AppVeyor environment - below you’ll see how to do that.
Sign up for AppVeyor account
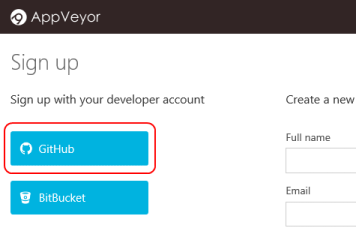
If you don’t have AppVeyor account yet you should definitely get one! Go to https://ci.appveyor.com/signup and use “GitHub” button to sign up for Free plan which allows you building public repositories.
Add new project
Click New project and select GitHub repository:
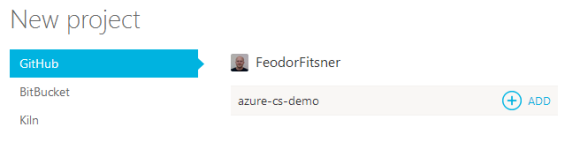
AppVeyor will automatically configure webhook for the repo to start a new build on every push.
Enable NuGet packages restore
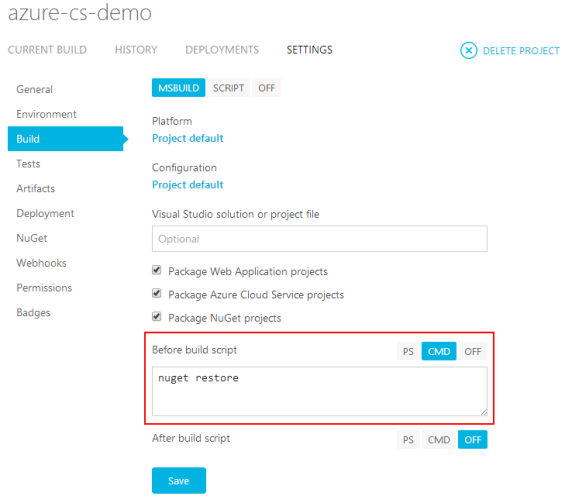
To enable restore of NuGet packages during the build open project settings and add “nuget restore” command into before build script:
Start new build
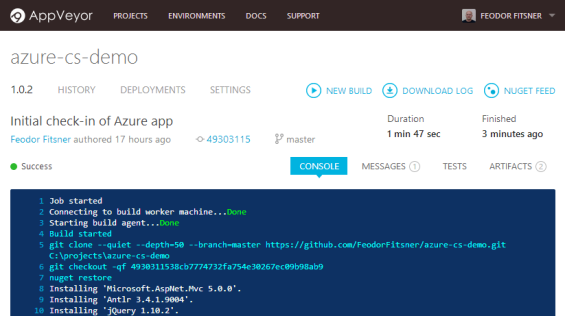
Run New build and see its progress in a real-time build console:
If you click Artifacts tab upon build completion you will see that AppVeyor automatically detected and packaged Azure Cloud Service project along with its configuration:

In just a few minutes we have a pretty decent Continuous Integration process for our Azure Cloud Service!
Add new Azure Cloud Service environment
Now let’s deploy our “experimental” app to Windows Azure. Go to Environments and add new “Azure Cloud Service” environment:
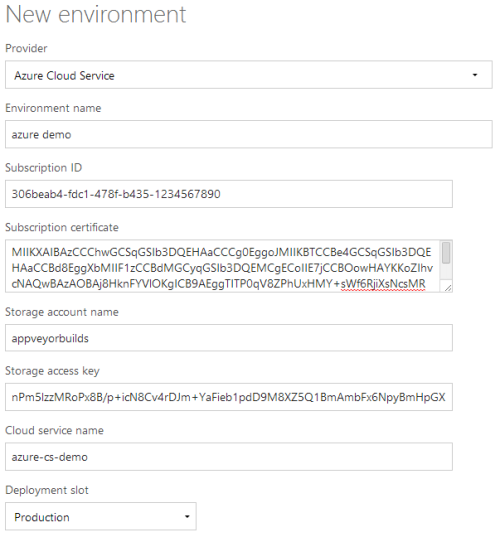
The form requires 3 prerequisites:
- Your Windows Azure account subscription details (Subscription ID and certificate).
- Storage account for uploading Azure CS package (.cspkg file produced during the build) and then deploying from it.
- Cloud Service to deploy to.
Subscription details
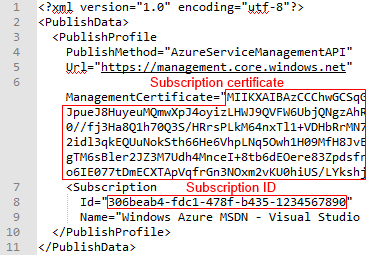
Download Azure account publishing profile and open it in text editor. Copy subscription ID and Base64 encoded subscription certificate.
Start new deployment
Now kick off new deployment of azure-cs-demo project to azure demo environment:
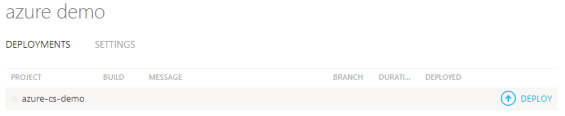
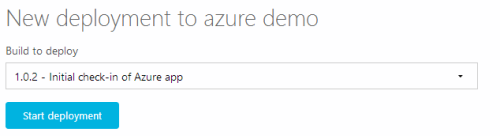
Select the build to deploy:
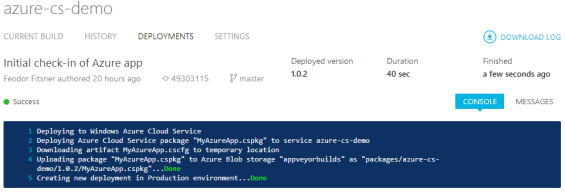
Observe the progress of deployment in the real-time console:
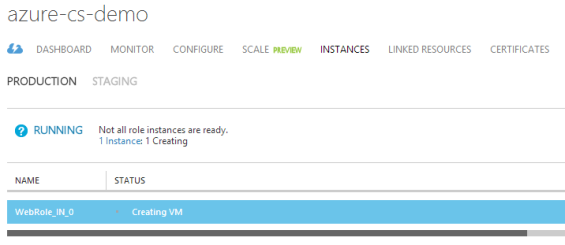
Azure Cloud Service package from build 1.0.2 artifacts has been deployed and you can see the results in Azure Portal:
Deploying as part of the build
Now after we triggered deployment manually from UI we’d like to completely automate the process and deploy during successful build. To setup deployment to azure demo environment open “Deployment” tab of project properties, add new “Environment” deployment and specify “azure demo” as environment name:
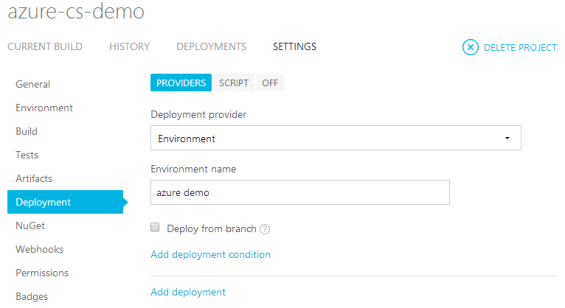
Done! Next time you push your changes into GitHub repository or start a new build on UI AppVeyor will build solution, run tests and deploy to Azure.
Enjoy!
About NuGet package restore
Posted on March 18, 2014
NuGet provides few different methods of restoring missing NuGet packages during application development on in Continuous Integration environment. In this article we’ll review these methods to find out which one to choose for using in AppVeyor CI environment.
After reading the original NuGet Package Restore article on NuGet docs web site we see that today we have three options for restoring packages:
Restoring packages as part of MSBuild process
Important note here - not before, but during MSBuild process. This is accomplished by injecting nuget.targets into build pipeline, so you end up with .nuget folder in your solution. This method works in build environment and requires consent which is EnableNuGetPackageRestore environment variable (it’s ON by default starting from NuGet 2.7 but we set it in AppVeyor environment for compatibility with previous NuGet versions). Starting from NuGet 2.7 this method is considered as obsolete as it requires additional folder with nuget.exe, nuget.targets and do not work in some scenarios (remember that chicken/egg problem with BCL packages.
Automatic package restore in Visual Studio
This method is part of NuGet Visual Studio add-in (.vsix), heavily relies on VS events and works in interactive mode, not build environment. Excerpt from that page:

In other words, restore occurs in Visual Studio and before MSBuild process.
Command-line package restore
The method was always there, but “was improved in NuGet 2.7”. This is exactly what we need and do in AppVeyor build environment! All that you need is to put “nuget restore” command into “Install scripts” or “Before build scripts” box of your project settings:
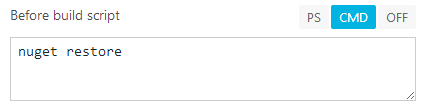
or in appveyor.yml:
before_build:
  - nuget restore
Hope that helps.
Converting a Mercurial repository to Git on Windows
Posted on February 23, 2014
The vast majority of AppVeyor customers use Git, specifically GitHub. Historically, we’ve been using Mercurial for AppVeyor source control, but recently due to the growing popularity and ecosystem of Git and GitHub we thought maybe it’s time to jump Git train and start using it for AppVeyor projects.
The first problem we faced with was converting existing Mercurial repositories to Git with preserving all history and authors. If you search in Google for converting mercurial to git on Windows you will find some (mostly similar) posts on SO, but none of them worked for us if followed “as is” on Windows. After many trials we found the way that 100% works and could be easily reproduced - everything was done from scratch on a clean Windows Server 2012 machine.
This article specifically describes migration of project from BitBucket’s Mercurial repository (original) to GitHub (migrated) using hg-fast-export tool.
Install required software
We assume you start from a clean Windows Server 2012 machine.
- Git for Windows (install the latest version, select “Run Git from the Windows Command Prompt” while installing Git)
- Mercurial 2.9 MSI installer - x86 Windows
- Python 2.7.6
- add
c:\Python27toPATH
Open command line prompt and make sure all tools are available in the PATH: hg, git, python.
Migration
We will be doing everything in c:\projects directory.
Open command prompt.
cd c:\projects
Clone source Mercurial repository:
hg clone https://bitbucket.org/appveyor/demoapp
Create an empty GitHub repository and clone it to demoapp_git directory:
git clone https://github.com/AppVeyor/DemoApp.git demoapp_git
Clone hg-fast-export repository:
git clone http://repo.or.cz/r/fast-export.git
Open c:\projects\fast-export\hg-fast-export.py in Notepad and replace highlighted region with the code below:
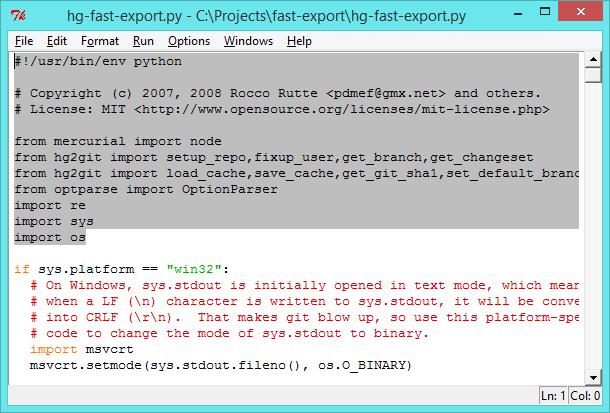
#!/usr/bin/env python

# Copyright (c) 2007, 2008 Rocco Rutte <pdmef@gmx.net> and others.
# License: MIT <http://www.opensource.org/licenses/mit-license.php>

import sys

# import mercurial libraries from zip:
sys.path.append(r'C:\Program Files (x86)\Mercurial\library.zip')

from mercurial import node
from hg2git import setup_repo, fixup_user, get_branch, get_changeset
from hg2git import load_cache, save_cache, get_git_sha1, set_default_branch, set_origin_name
from optparse import OptionParser
import re
import os
Copy content of fast-export to demoapp_git ignoring .git folder.
Switch to demoapp_git directory:
cd demoapp_git
If you need to map authors to new repository with different name/email create authors.txt with one mapping per line (old=new), like below:
Feodor Fitsner <feodor@appveyor.com>=Feodor Fitsner <feodor@fitsner.com>
Run Python script to import Mercurial repo into Git one (you are running this script from Git repository directory):
hg-fast-export.sh -r c:\projects\demoapp -A authors.txt
Checkout HEAD to check that everything looks good:
git checkout HEAD
Remove conversion files:
git clean -f
del /Q hg2git.pyc
Rename .hgignore to .gitignore:
ren .hgignore .gitignore
git add .gitignore
git commit -m ".hgignore renamed to .gitignore"
Push Git repo to GitHub:
git push -u origin master
Enjoy!